How to Add and Delete Pages from Your Website
Managing the pages of your website is essential for keeping your content up-to-date and organized. Whether you want to add a new page or remove an outdated one, Quick Server makes it simple. Here’s a step-by-step guide on how to add and delete pages from your website.
Step 1: Log In to the Dashboard
- Log in to your Quick Server account using your credentials.
- Once logged in, navigate to the dashboard where you can manage all aspects of your website.
- Ensure you are in the editor mode to make changes to your site’s structure.
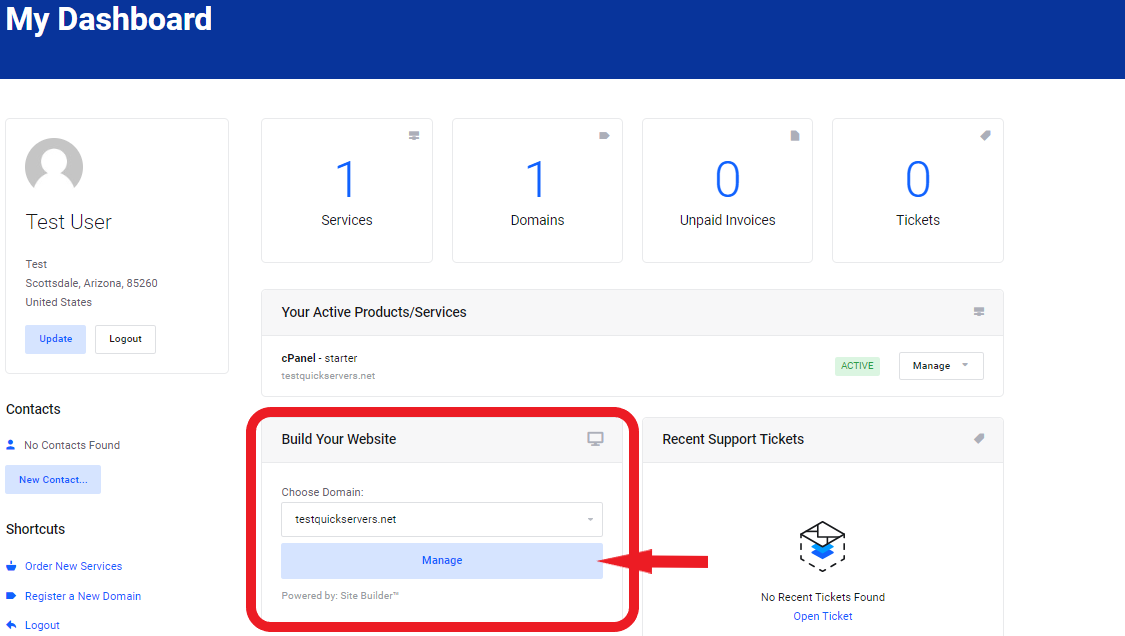
Step 2: Go to the Pages Section
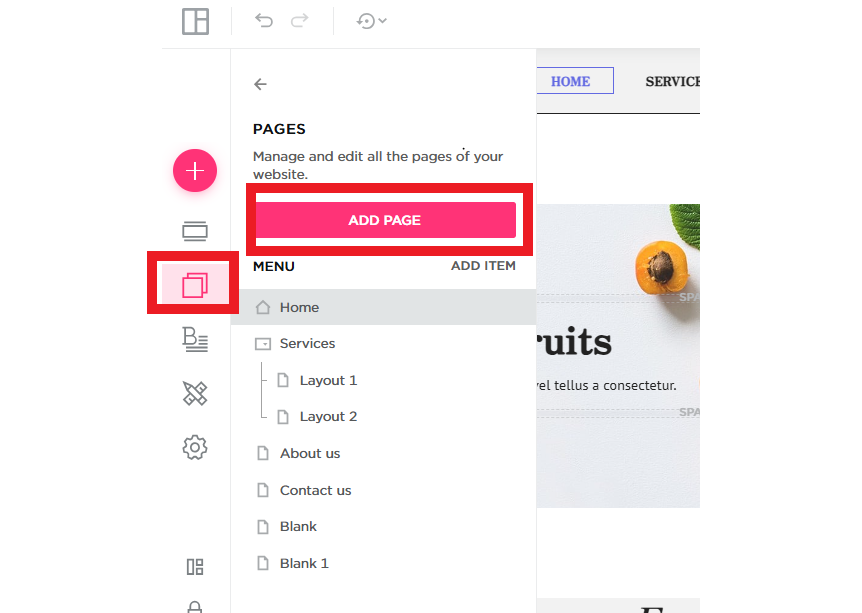
- In the dashboard, locate and click on the “Pages” option.
- This section contains all the pages currently on your website, and you can add, edit, or delete pages from here.
Step 3: Click to Add a Page
- To add a new page, click on the “Add Page” button or “+ New Page” option.
- A pop-up or new window will appear with different options for creating your page.
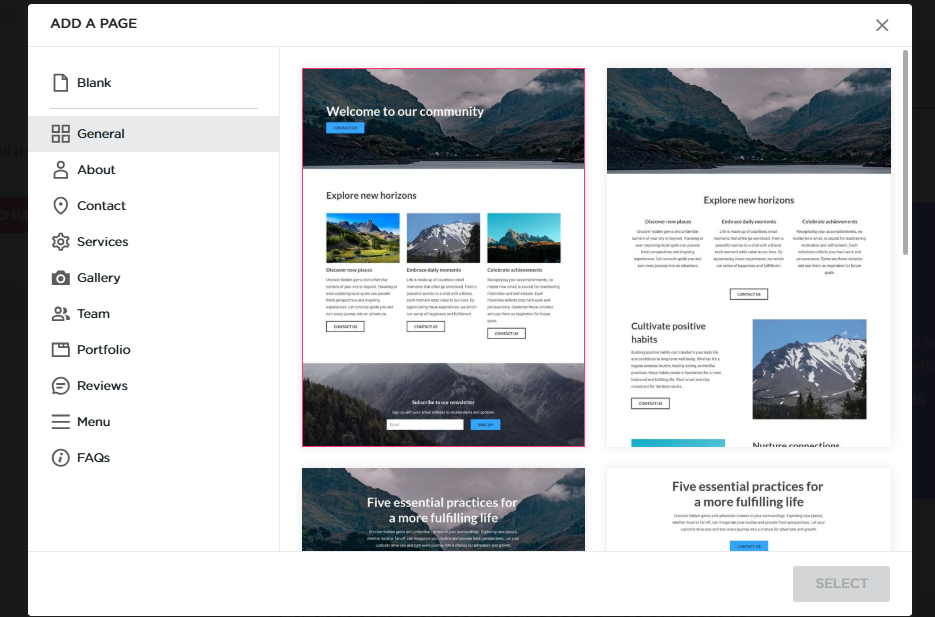
Step 4: Choose Between Blank or Template Pages
- You will be prompted to either choose a blank page or select from pre-designed templates.
- If you want to start from scratch, select the “Blank Page” option.
- If you prefer to use a pre-designed layout, browse through the templates and choose one that fits your website’s needs.
Step 5: Customize Your New Page
- After selecting a blank page or template, you’ll be taken to the page editor.
- Here, you can add elements like text, images, videos, and other content blocks.
- Customize the page according to your design preferences by adjusting the layout, colors, fonts, and more.
Step 6: Name and Publish the Page
- Once you’ve customized your page, give it a name that reflects its content (e.g., “Contact Us” or “Blog”).
- Afterward, click on the “Publish” button to make the page live on your website.
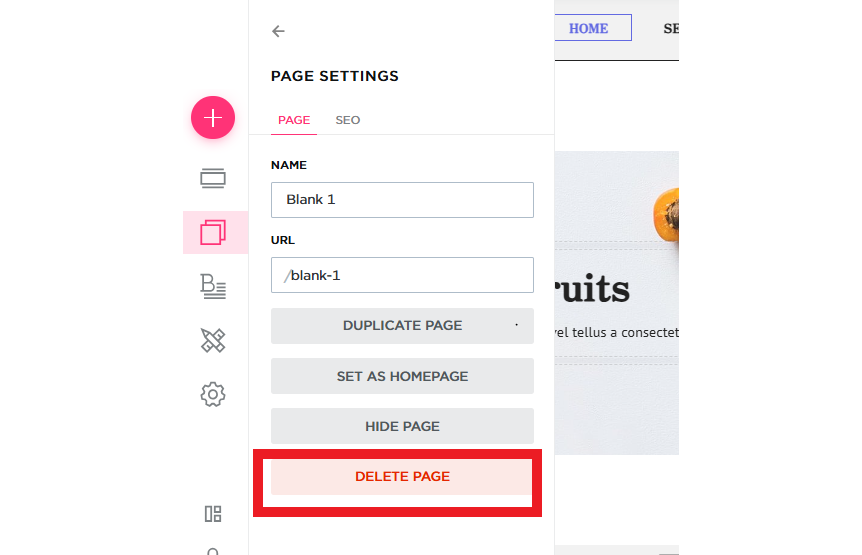
Step 7: Deleting a Page
- If you want to delete an existing page, return to the “Pages” section in your dashboard.
- Find the page you want to delete and click on the three-dot menu (or options icon) next to it.
- Select “Delete” from the dropdown menu. Confirm your choice when prompted to permanently remove the page.
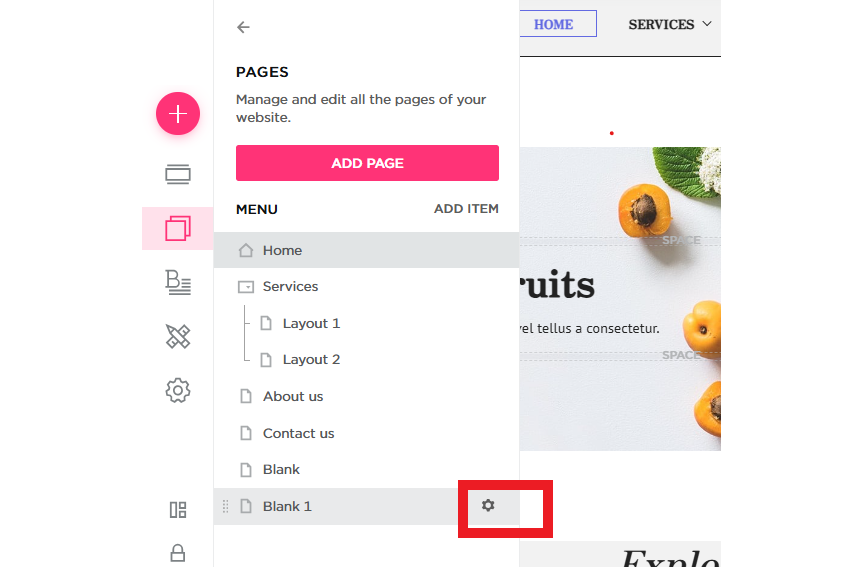
Step 8: Confirm Deletion and Final Adjustments
- Once you’ve confirmed the deletion, the page will be removed from your site.
- Make sure to update any navigation menus or internal links that may have pointed to the deleted page.
Step 9: Review and Finalize Changes
- After adding or deleting pages, review your website to ensure everything is functioning properly.
- Check that your navigation menus reflect the changes and that any internal links are still working correctly.