How to Configure Apache Virtual Hosts on Your VPS
Apache Virtual Hosts allow you to host multiple websites on a single VPS. This is particularly useful when you want to manage different domains or subdomains independently. Follow this step-by-step guide to configure Apache Virtual Hosts.
Step 1: Update Your VPS and Install Apache
Ensure your system is up to date and Apache is installed.
- Update the package list and install Apache:
sudo apt update && sudo apt upgrade -y sudo apt install apache2 -y - Verify that Apache is running:
sudo systemctl status apache2
Step 2: Create Directories for Your Websites
Each website needs its own directory to store files.
- Create a directory for the first website (e.g.,
example1.com):sudo mkdir -p /var/www/example1.com/html - Set permissions for the directory:
sudo chown -R $USER:$USER /var/www/example1.com/html sudo chmod -R 755 /var/www/example1.com - Repeat these steps for additional websites (e.g.,
example2.com).
Step 3: Create Sample Index Files
Add an index.html file for each website to test the configuration.
- Create the file for
example1.com:echo "<h1>Welcome to Example1.com</h1>" | sudo tee /var/www/example1.com/html/index.html - Do the same for
example2.comor other domains.
Step 4: Create Virtual Host Configuration Files
Virtual Host files define settings for each website.
- Copy the default Apache configuration file to create one for
example1.com:sudo cp /etc/apache2/sites-available/000-default.conf /etc/apache2/sites-available/example1.com.conf - Edit the configuration file:
Replace its contents with:sudo nano /etc/apache2/sites-available/example1.com.conf<VirtualHost *:80> ServerAdmin admin@example1.com ServerName example1.com ServerAlias www.example1.com DocumentRoot /var/www/example1.com/html ErrorLog ${APACHE_LOG_DIR}/example1.com_error.log CustomLog ${APACHE_LOG_DIR}/example1.com_access.log combined </VirtualHost> - Save and exit the file (
Ctrl+O,Enter,Ctrl+X). - Repeat for other websites (e.g.,
example2.com), changing the domain and directory names.
Step 5: Enable Virtual Hosts
Activate the Virtual Host configuration files.
- Enable the
example1.comVirtual Host:sudo a2ensite example1.com.conf - Disable the default Virtual Host if it's not needed:
sudo a2dissite 000-default.conf - Reload Apache to apply changes:
sudo systemctl reload apache2
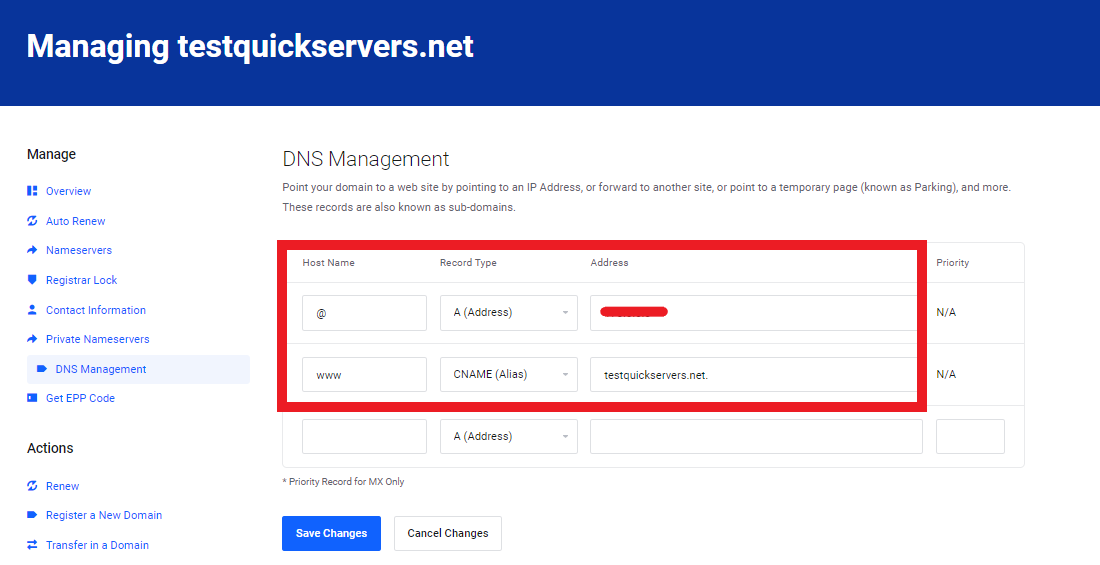
Step 6: Update DNS Settings
Ensure your domain points to your VPS by updating its DNS records.
- Log in to your domain registrar’s dashboard.
- Update the A Record to point to your VPS’s IP address.
- Allow some time for DNS propagation.

Step 7: Test Your Configuration
- Open a web browser and navigate to
http://example1.com. - You should see the message:
Welcome to Example1.com - Repeat for other domains to ensure they load correctly.
Step 8: Enable SSL (Optional but Recommended)
Secure your websites with SSL certificates using Let’s Encrypt.
- Install Certbot:
sudo apt install certbot python3-certbot-apache -y - Obtain and configure SSL for your domain:
sudo certbot --apache -d example1.com -d www.example1.com - Follow the prompts to complete the setup.
Troubleshooting Tips
- Error 403 Forbidden: Check file and directory permissions. Ensure the web server has access to the
DocumentRootdirectory. - Website Not Loading: Verify DNS settings and ensure the domain points to your VPS’s IP address.
Note: Configuring Apache Virtual Hosts allows you to host multiple websites on one VPS efficiently, ensuring better resource utilization and management.

