How to Install Ubuntu on Your Dedicated Server
Ubuntu is a popular Linux distribution that is widely used for its user-friendly interface and robust features. If you're a QuickServers.net customer looking to install Ubuntu on your dedicated server, follow this detailed step-by-step guide to complete the process.
Step 1: Backup Your Existing Data
Before proceeding with the installation, ensure that all important data is backed up.
- Create a backup of all files and databases: Use a secure external drive or a reliable backup service.
- Verify the backup: Check that all files are accessible and intact.
Step 2: Access Your Server’s Control Interface
To begin the installation process, log in to the QuickServers.net customer portal and access the server management options.
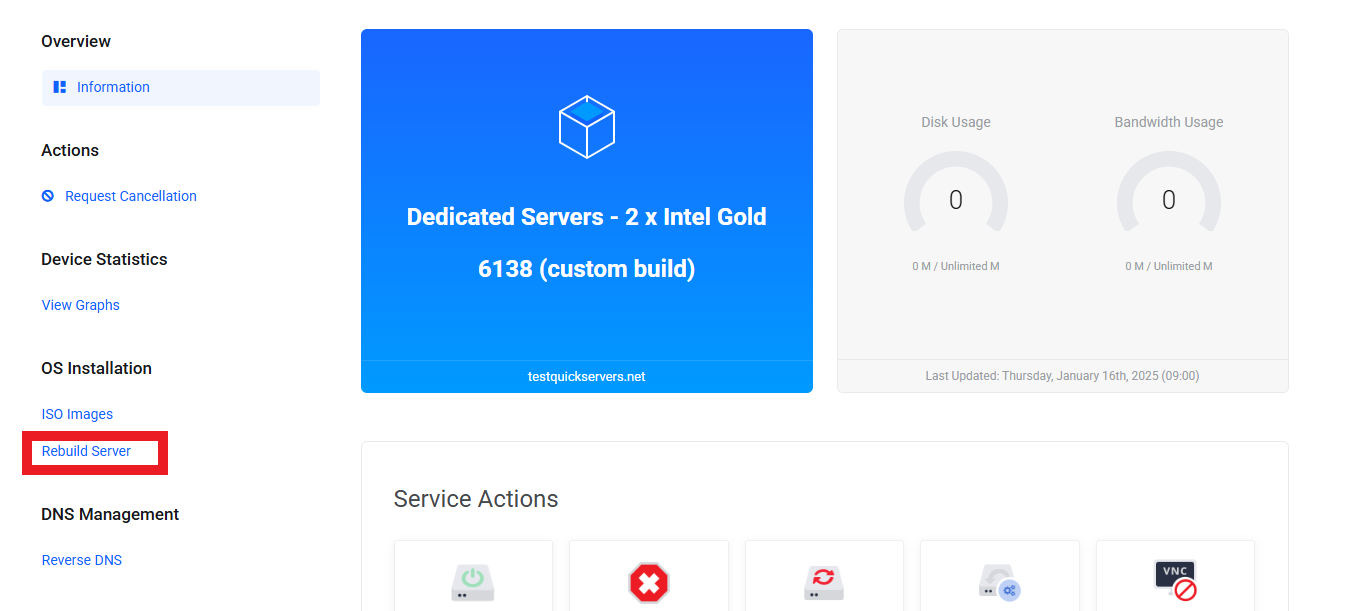
- Locate the reinstallation option: Navigate to the section where you can reinstall the operating system.
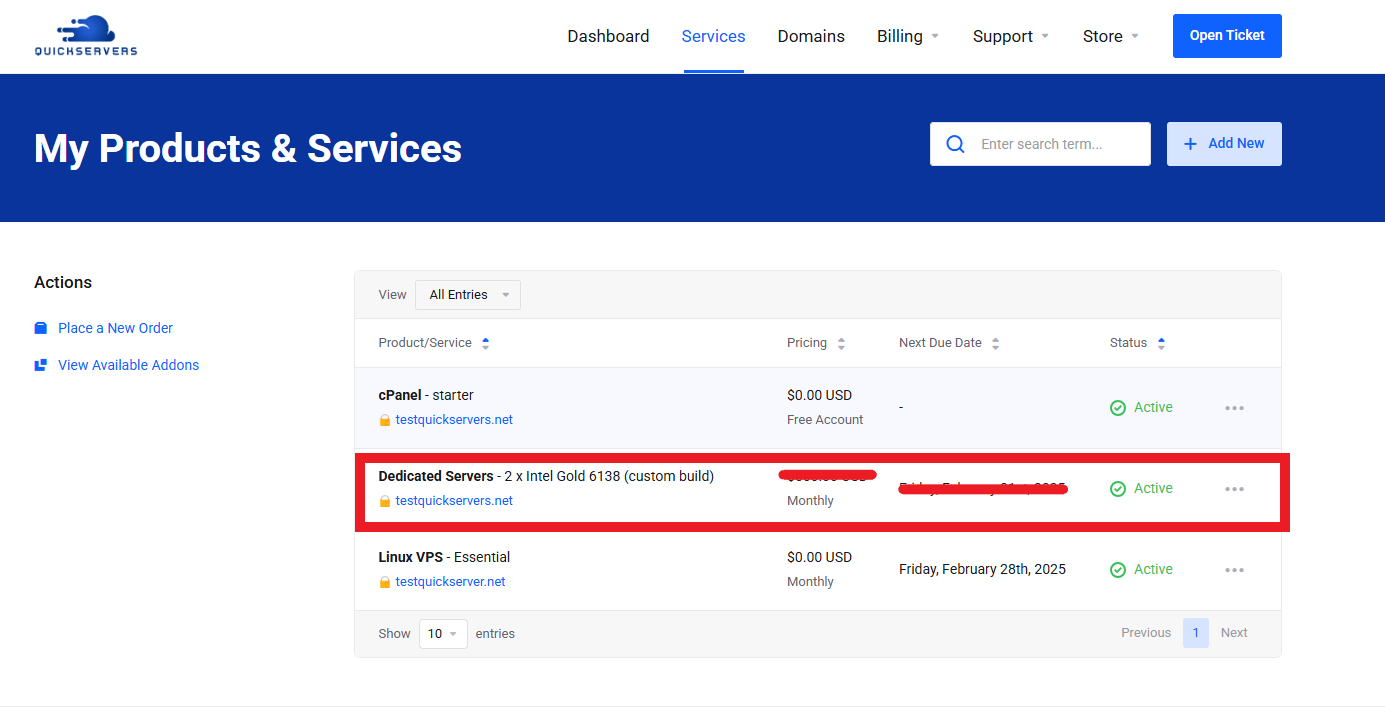
- Select the server you wish to configure: Ensure you're making changes to the correct server.
Step 3: Select Ubuntu as the Operating System
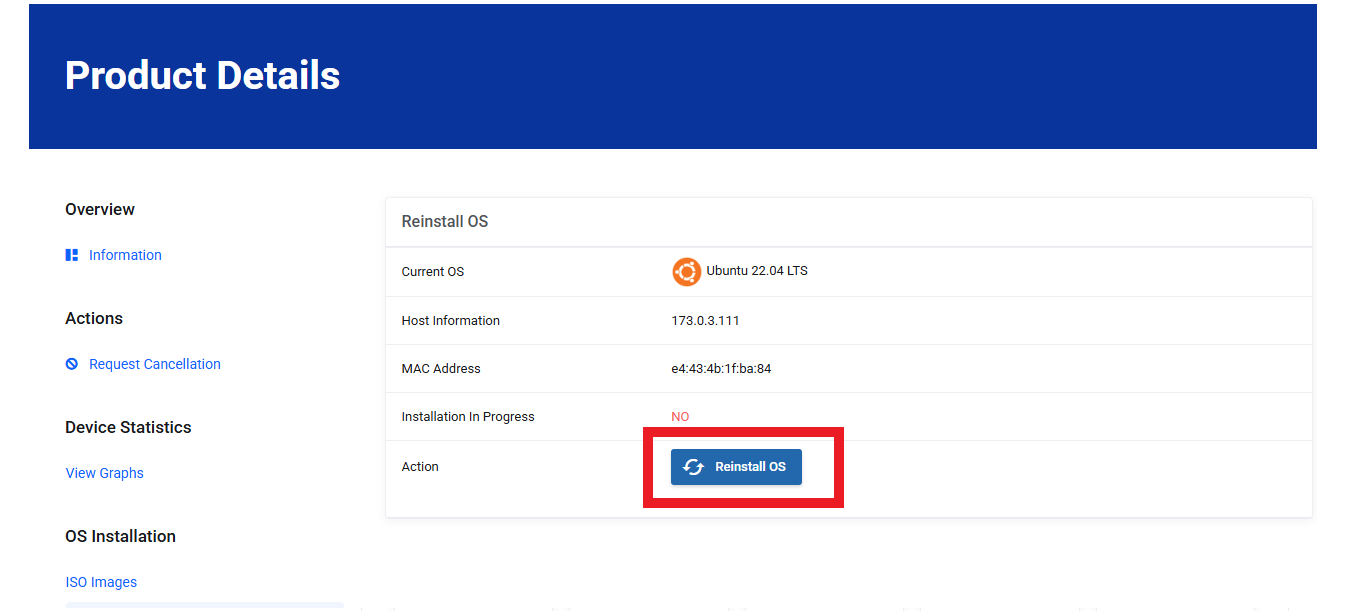
QuickServers.net provides options to install various operating systems, including Ubuntu.
- Choose the desired Ubuntu version: Select the version of Ubuntu that best suits your requirements (e.g., Ubuntu 22.04 LTS for long-term support).
- Confirm the selection: Ensure you’ve chosen the correct OS version before proceeding.
Step 4: Configure the Installation Settings
Depending on the available options, you may be able to customize the installation.
- Set the disk partitioning method: Choose between automatic partitioning or manual configuration if you have specific requirements.
- Select additional software: Some installations allow you to include specific software packages during the setup process.
Step 5: Initiate the Installation
Start the reinstallation process to install Ubuntu on your dedicated server.
- Confirm your actions: Double-check your settings and confirm the OS reinstallation.
- Wait for the process to complete: The installation may take several minutes, depending on the server specifications.
Step 6: Configure Your Server Post-Installation
Once Ubuntu is installed, perform initial configuration tasks.
- Set up a root password: Create a strong, secure password for administrative access.
- Create a non-root user: Add a user with sudo privileges for enhanced security.
adduser username usermod -aG sudo username - Update the package manager: Ensure that Ubuntu is up-to-date with the latest patches.
sudo apt update && sudo apt upgrade -y
Step 7: Verify the Installation
Check that the installation was successful and the server is functioning properly.
- Test SSH access: Log in to your server remotely to confirm connectivity.
- Check system details: Use the following command to verify the Ubuntu version.
lsb_release -a
Step 8: Install Essential Tools and Services
Based on your use case, install any necessary software or services.
- Install a web server:
sudo apt install apache2 -y - Install database management tools:
sudo apt install mysql-server -y - Install additional utilities: Add tools like Git, curl, or htop as needed.
Step 9: Secure Your Ubuntu Server
After installation, securing your server is crucial to protect it from vulnerabilities.
- Enable a firewall:
sudo ufw enable sudo ufw allow OpenSSH - Disable root login via SSH: Edit the SSH configuration file to enhance security.
Locatesudo nano /etc/ssh/sshd_configPermitRootLoginand set it tono. Restart SSH:sudo systemctl restart sshd
Step 10: Test and Finalize the Setup
After completing the installation and security measures:
- Run performance checks: Use commands like
toporhtopto monitor server performance. - Test all services: Ensure that the server is ready for its intended applications.
With Ubuntu installed on your dedicated server, you now have a powerful and flexible operating system ready for your needs. For more assistance or to explore dedicated server options, visit QuickServers.net.
