How to Set Up an Automated Testimonial Rotator on QuickServers
Displaying customer testimonials on your website is an excellent way to build trust and credibility. An automated testimonial rotator allows you to showcase multiple reviews dynamically, improving engagement and conversions. This guide will show you how to set up an automated testimonial rotator on your QuickServers website.
Step 1: Understand the Benefits of a Testimonial Rotator
- Enhances social proof by displaying customer feedback dynamically.
- Saves space by cycling through multiple testimonials instead of listing them all at once.
- Keeps visitors engaged with an interactive and visually appealing section.
- Encourages new customers to trust your services.
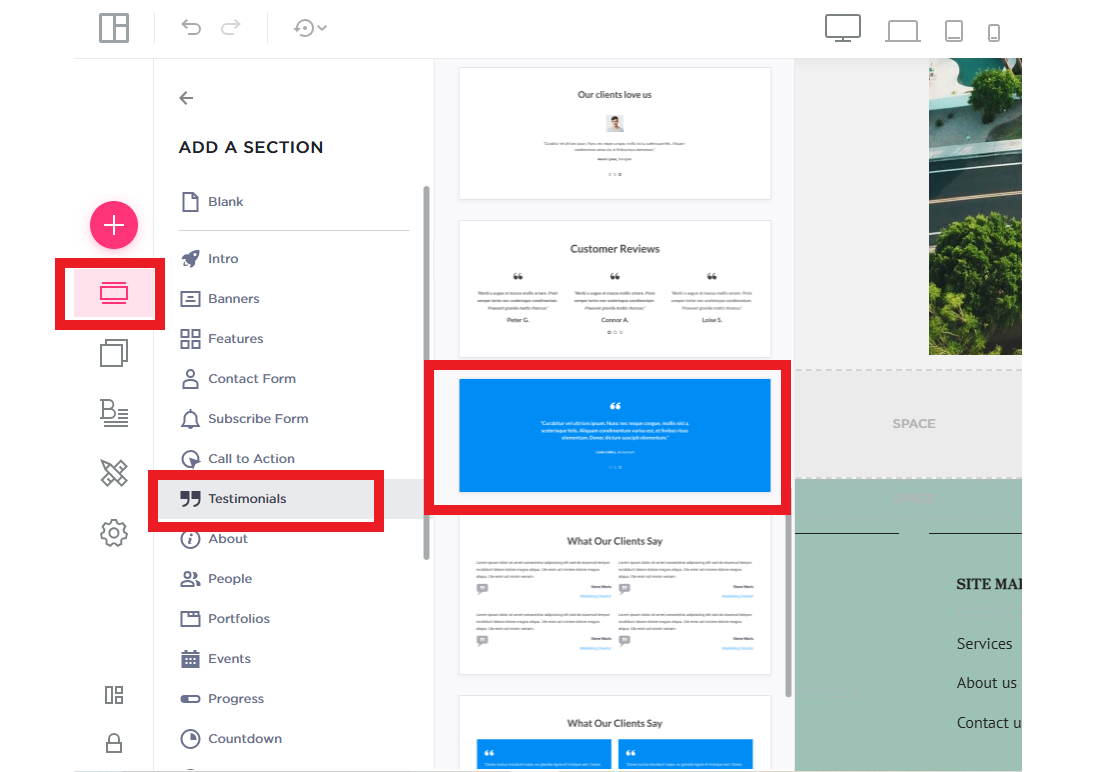
Step 2: Choose a Testimonial Layout
- Decide whether you want a carousel-style or fade-in transition for the rotating testimonials.
- Opt for a minimalist design to keep the focus on customer feedback.
- Consider including customer images or star ratings for added credibility.
Step 3: Add Testimonials to Your Website
- Navigate to the section where you want to display testimonials.
- Input customer reviews, ensuring they are genuine and relevant to your business.
- Include the customer’s name, business (if applicable), and photo for authenticity.
- Keep testimonials short and impactful for better readability.
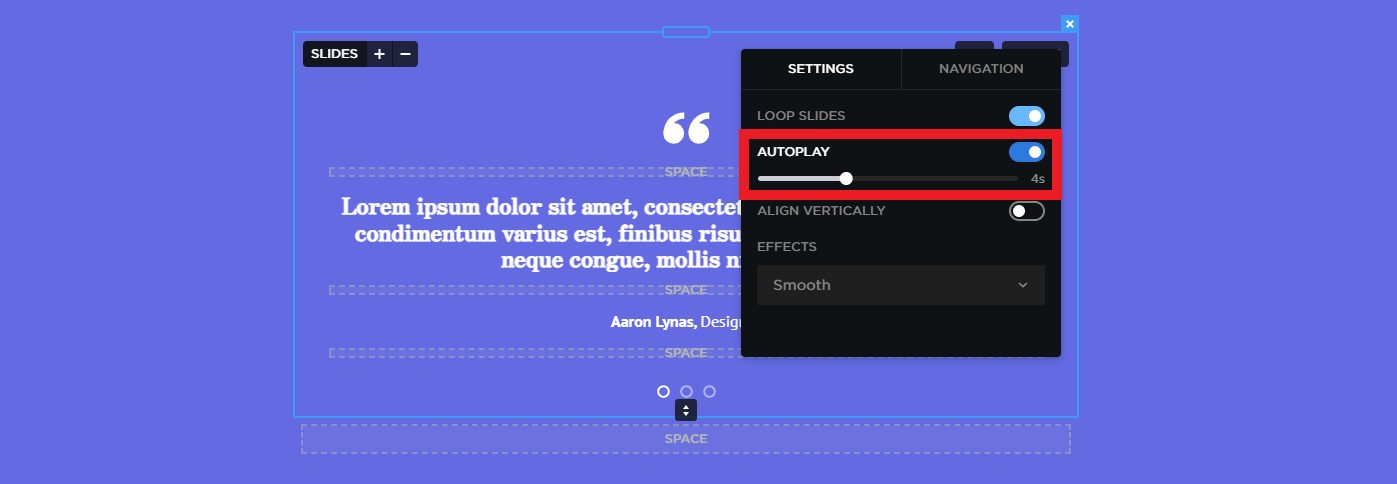
Step 4: Enable the Testimonial Rotator Feature
- Configure settings such as rotation speed, animation style, and number of testimonials to display at once.
- Adjust the transition time to ensure testimonials remain readable before switching.
Step 5: Customize the Appearance of the Rotator
- Choose a font style that matches your website’s design.
- Adjust the background color, borders, and spacing to make the section visually appealing.
- Ensure the text is readable against the background for a user-friendly experience.
Step 6: Optimize for Mobile Devices
- Test the testimonial rotator on smartphones and tablets to ensure responsiveness.
- Adjust settings so the rotator scales properly on smaller screens.
- Make sure navigation controls (arrows or dots) are easily clickable on mobile.
Step 7: Save and Preview Your Testimonial Rotator
- Click save and preview the page to check the testimonial transitions.
- Ensure testimonials rotate smoothly and without delays.
- Test across different browsers to confirm compatibility.
Step 8: Monitor and Update Testimonials Regularly
- Periodically add new testimonials to keep the section fresh.
- Remove outdated or irrelevant reviews.
- Track visitor engagement and make adjustments to rotation speed or layout if necessary.
By setting up an automated testimonial rotator on your QuickServers website, you can effectively highlight customer feedback, build trust, and enhance the overall user experience. This dynamic feature not only makes your site look professional but also encourages potential clients to choose your services.
