How to Create an Eye-Catching Banner for Sales & Promotions
Banners are a powerful tool to grab attention and promote sales, discounts, or special offers on your website. With the right design and placement, banners can effectively drive more conversions. Follow this step-by-step guide to create an eye-catching banner for sales and promotions on your QuickServers website.
Step 1: Decide on the Banner’s Purpose
- Determine the goal of your banner. What promotion are you running? Is it a limited-time offer, a discount, or a new product announcement?
- Make the message clear and concise, such as “50% Off This Weekend Only!” or “Limited Time Offer – Shop Now!”
Step 2: Choose the Right Dimensions for Your Banner
- Choose the optimal size for your banner. A width of 1200px is common, but adjust this based on your website’s layout.
- Ensure the banner isn’t too large if placed in the header so it doesn’t overpower other content.
- Consider mobile users by ensuring the banner fits appropriately across various screen sizes.
Step 3: Design the Banner
- Use bold, contrasting colors that reflect your promotion while complementing your website’s branding.
- Choose high-quality images that are relevant to your offer (e.g., product images for a sale).
- Keep text minimal and clear, with a short headline like "Huge Sale!" or "Free Shipping Today!"
- Use readable fonts that stand out against the background.
Step 4: Navigate TO Add a New Section
Once you’re logged in, it’s time to add a new section to your site where the promotional banner will appear.
- From the dashboard, navigate to the page where you want to add the banner.
- Click on the "Add Section" button to open the section options.
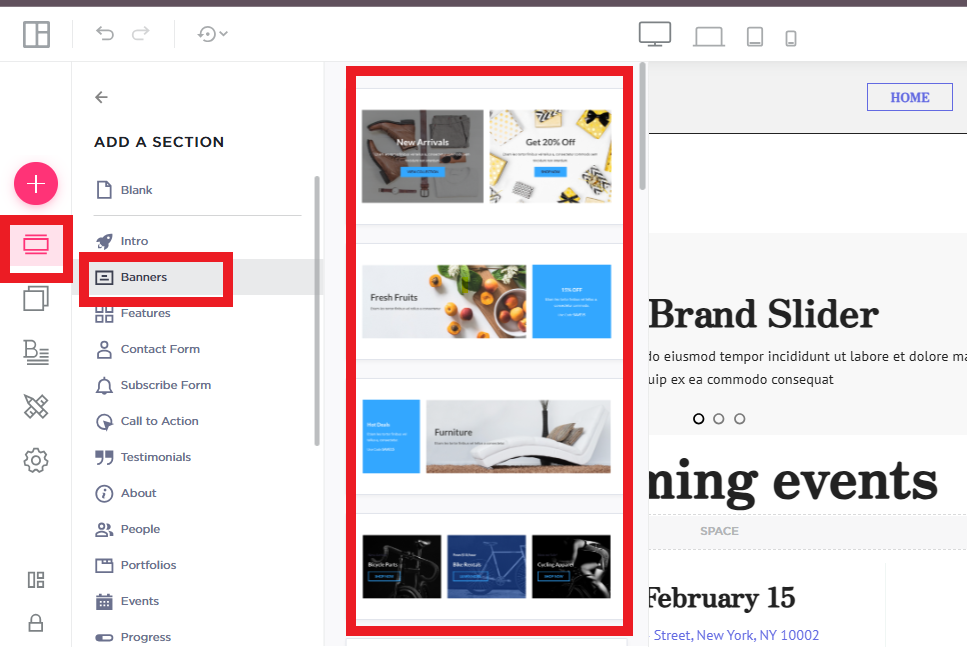
Step 5: Choose the "Banner" Option
After adding a section, you’ll be prompted to choose the type of section you want to add. For a promotional banner, select the banner style.
- In the section options, find and select the "Banner" option.
- Click on it to choose the banner style that fits your needs.
Step 6: Select a Banner Style
Edit, Site offers various banner styles to choose from. Pick the style that best suits your promotion.
- Browse through the available banner styles.
- Choose the style that aligns with your branding and the type of promotion you want to display.
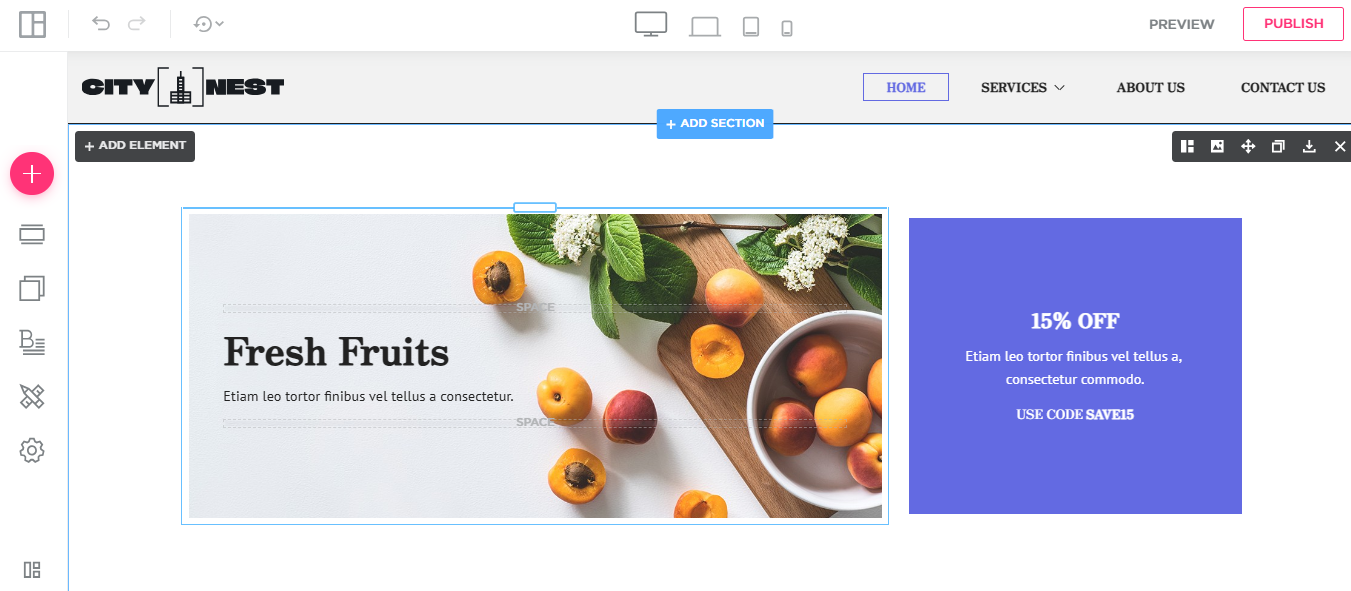
Step 7: Customize the Banner Content
Once you've selected a banner style, it's time to add your promotional content.
- Add text, such as "Exclusive Offer" or "Save 30% Today!"
- Customize the font, size, and color to match your website’s theme.
- If you want, you can upload an image or logo that represents your promotion.
Step 8: Customize the Banner Appearance
Now, you can fine-tune the appearance of your banner to make it more appealing.
- Adjust the background color, padding, and margins to ensure the banner stands out.
- You can also choose whether to add a call-to-action button, such as "Shop Now" or "Learn More," that directs visitors to your promotion’s landing page.
Step 9: Save and Publish the Banner
After customizing your banner, make sure to save and publish your changes.
- Click the "Save" or "Publish" button to apply the banner to your website.
- Preview the banner on your site to ensure it looks as expected.
Step 10: Test the Banner
Finally, test your banner to make sure it displays correctly.
- Go to your website and check the page where the banner should appear.
- Ensure the banner works properly on both desktop and mobile devices.
- Test any links or buttons on the banner to ensure they direct visitors to the correct page.
By following these steps, you can easily create a custom promotional banner on QuickServers using Edit, Site. This will help you highlight your promotions and engage your website visitors more effectively.
