How to Preview Your Website Before Publishing
Previewing your website before it goes live is crucial to ensure everything looks and functions as expected. It helps you catch any errors, check the design across different devices, and make sure the content is spot on. Here’s a step-by-step guide on how to preview your website before publishing it.
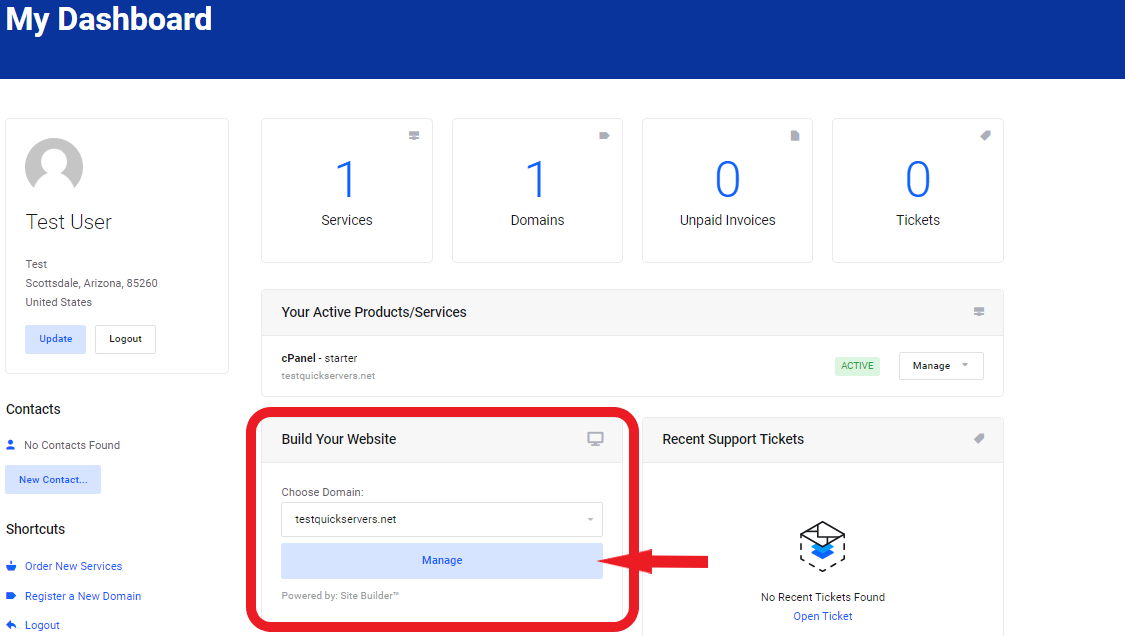
Step 1: Log In to Your Website Dashboard
- Log in to the dashboard of your website platform.
- Ensure you have access to the site editor where you can make changes and preview the content.
- The dashboard usually gives you access to all sections of your website, including pages, themes, and settings.
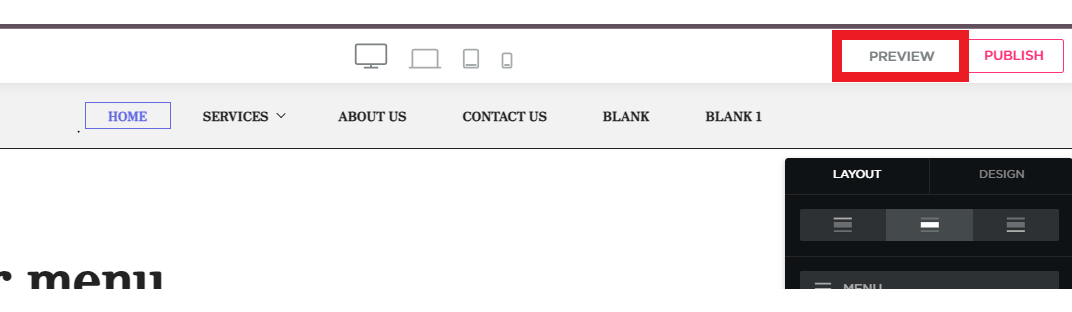
Step 2: Navigate to the Preview Option
- Look for a "Preview" button or an option in your website editor. This is typically found in the top-right corner or under the “Publish” section.
- The preview option allows you to view the site exactly as it will appear to your visitors, without actually publishing it.
Step 3: Review the Layout and Design
- Once in preview mode, carefully review the overall design of your website.
- Check if the layout looks as expected, with correct spacing, alignment, and responsive design across different screen sizes.
- Ensure that all images, videos, and other media are properly displayed and not distorted.
Step 4: Test Navigation and Links
- Click through the menu and all links on your site to ensure they lead to the correct pages.
- Test buttons, forms, and any interactive elements to verify they function properly.
- Check if the navigation is intuitive and that visitors can easily find what they’re looking for.
Step 5: Check Content Accuracy
- Review the content on each page to make sure there are no typos or grammatical errors.
- Confirm that the text is clear, concise, and well-formatted.
- Ensure that images and media align with the content and are appropriately sized.
Step 6: Test Mobile Responsiveness
- In preview mode, test how your website looks on mobile devices.
- Most website builders have built-in features that allow you to switch between desktop and mobile views.
- Verify that the layout adjusts correctly, and all elements are easy to navigate on smaller screens.
Step 7: Test Load Speed
- While previewing the website, pay attention to the load time for your pages.
- If a page is taking too long to load, check if there are large images or unnecessary elements that might be slowing it down.
- Consider optimizing media files or reducing unnecessary plugins to improve speed.
Step 8: Ensure All Forms and Features Are Working
- If your website has forms (such as a contact form), test them to ensure they send data correctly.
- Make sure any other features like pop-ups, slideshows, or embedded videos are functioning as intended.
- Verify that forms send confirmation messages or redirects to the correct thank-you page after submission.
Step 9: Make Final Adjustments
- After reviewing the preview, take note of any changes that need to be made.
- Return to the editor to adjust design elements, update content, fix broken links, or remove unnecessary items.
- Revisit the preview after making changes to confirm that everything is functioning properly.
Step 10: Publish Your Website
- Once you’re satisfied with the preview and feel confident that everything is perfect, go ahead and publish your website.
- Click the “Publish” button, and your site will go live for the world to see.
- It’s a good idea to monitor the site after publishing to ensure it functions as expected for visitors.
