Adding Alt Text to Images for Better Search Visibility
Adding alt text (alternative text) to images on your website is essential for improving both accessibility and search engine optimization (SEO). Alt text helps search engines understand what an image is about, which can improve your website's search visibility. Here's a step-by-step guide to adding alt text to images on your website.
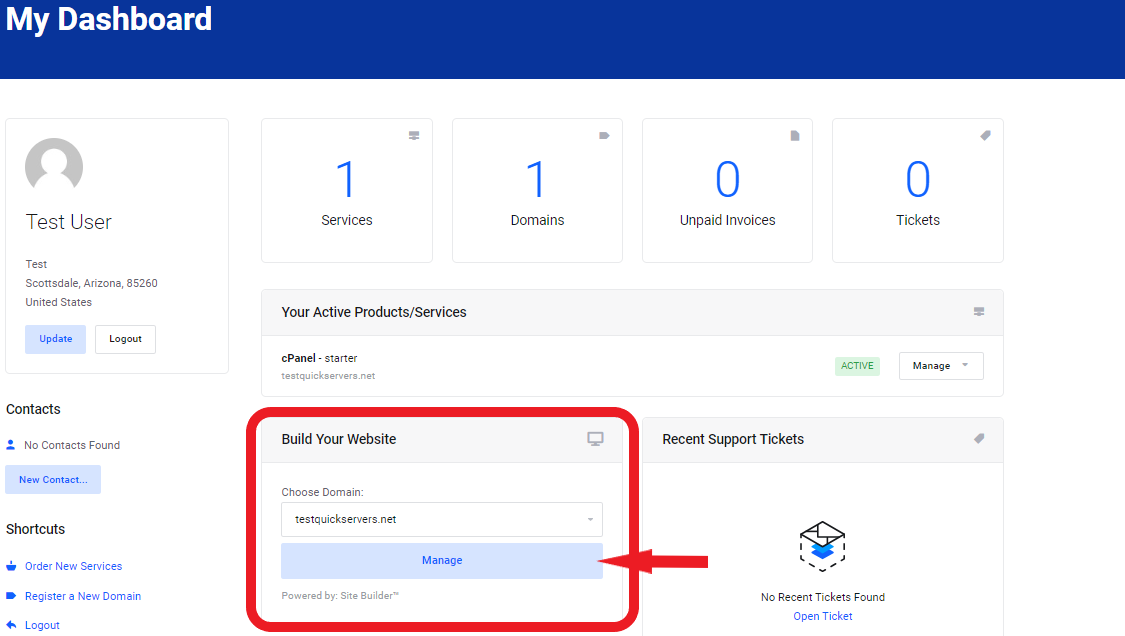
Step 1: Log In to Your Website Dashboard
- Start by logging in to your website's dashboard with your credentials.
- This is where you can manage your website’s content, including images and SEO settings.
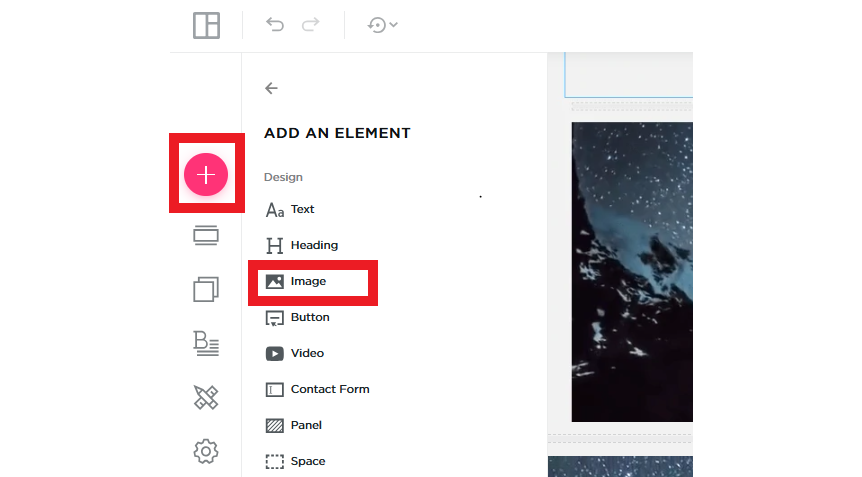
Step 2: Navigate to the "Elements" Section
- Once logged in, go to the "Elements" or "Widgets" section of your website editor.
- This section will have various components that you can drag and drop into your website’s pages, including images, text boxes, and other elements.
Step 3: Look for the "Image" Element
- In the "Elements" section, look for the "Image" option.
- This will allow you to add images to your website easily by dragging and dropping them onto your pages.
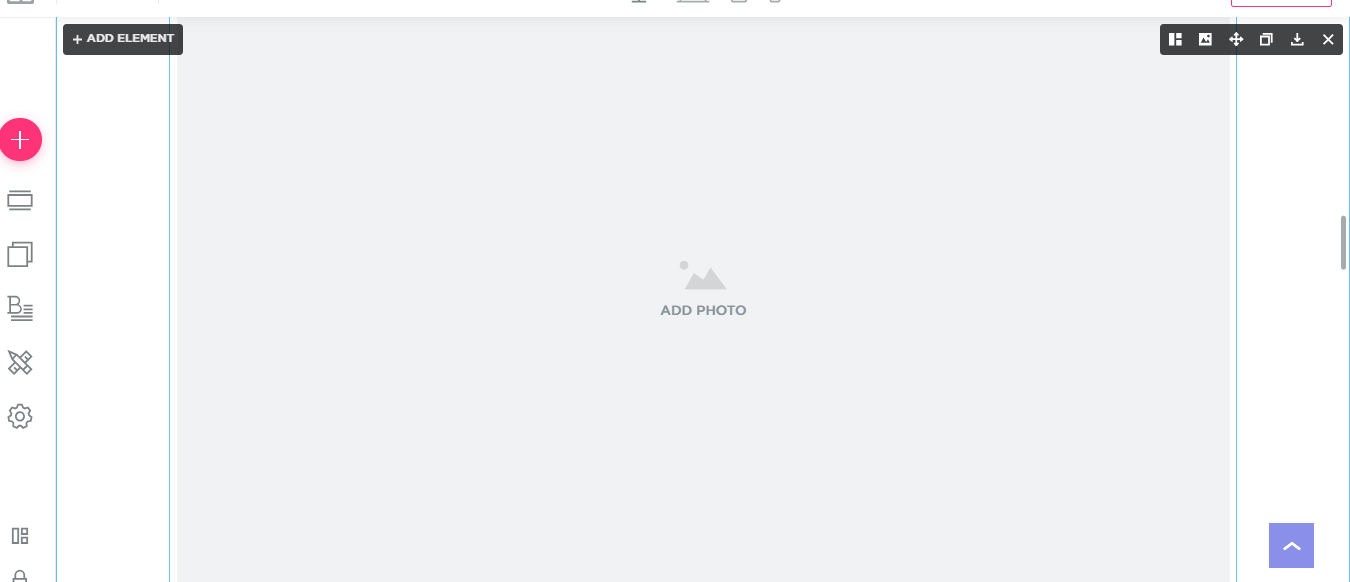
Step 4: Drag and Drop the Image Element
- Click and drag the “Image” element to the section of the page where you want to add your image.
- Drop the image element into place on the page. You will see an option to upload or select an image.
Step 5: Select or Upload the Image
- Click on the image element to open the settings panel.
- If you already have the image on your media library, select it. Otherwise, you can upload a new image by clicking the "Upload" button and selecting the file from your computer.
Step 6: Click on the Image to Edit Settings
- After selecting or uploading the image, click on the image itself to open the image settings.
- The settings panel will allow you to edit various aspects of the image, including its size, alignment, and alt text.
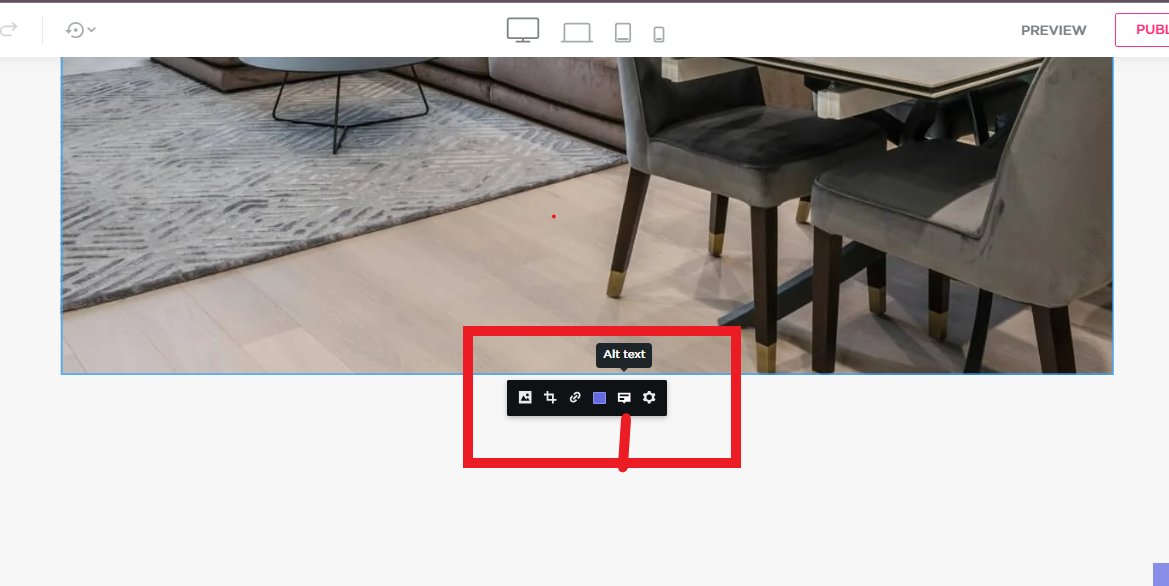
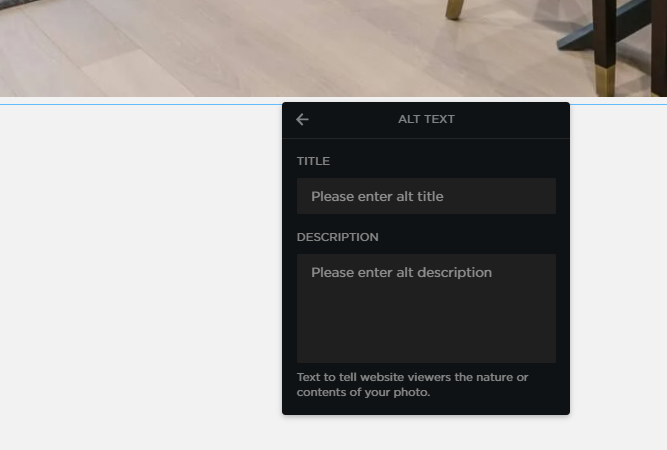
Step 7: Add Alt Text to the Image
- In the settings panel, look for the "Alt Text" field or option.
- In the "Alt Text" field, add a concise and descriptive title for the image. This should briefly describe what the image depicts and include relevant keywords, if possible.
- Example: "Delicious chocolate cake recipe ingredients"
- Ensure the description is clear, accurate, and relevant to the content surrounding the image.
Step 8: Add Title and Heading (Optional)
- If applicable, you can also add a title or heading for the image, which can help visitors understand what the image is about.
- Make sure the title is relevant to the image and fits with the overall content on the page.
- The heading is useful for both visitors and search engines, as it provides additional context.
Step 9: Save Changes
- After adding the alt text, title, and heading, click "Save" or "Update" to save the changes.
- Make sure to check that the alt text is properly saved and attached to the image.
Step 10: Preview and Publish
- Preview your page to ensure the image is displayed correctly with the alt text.
- If everything looks good, go ahead and publish your website to make the changes live.
