How to Design a Modern Testimonial Wall for Your Website
Displaying testimonials from satisfied customers on your website is a great way to build trust and credibility. A modern testimonial wall can provide a visually appealing, organized way to showcase the positive experiences of your clients. In this guide, we'll walk you through the steps to design a modern testimonial wall on your QuickServers website.
Step 1: Understand the Importance of Testimonials
- Testimonials provide social proof and help potential customers make informed decisions.
- Positive feedback from existing clients helps enhance your brand’s reputation and credibility.
- A well-organized testimonial wall can create a professional and trustworthy image for your business.
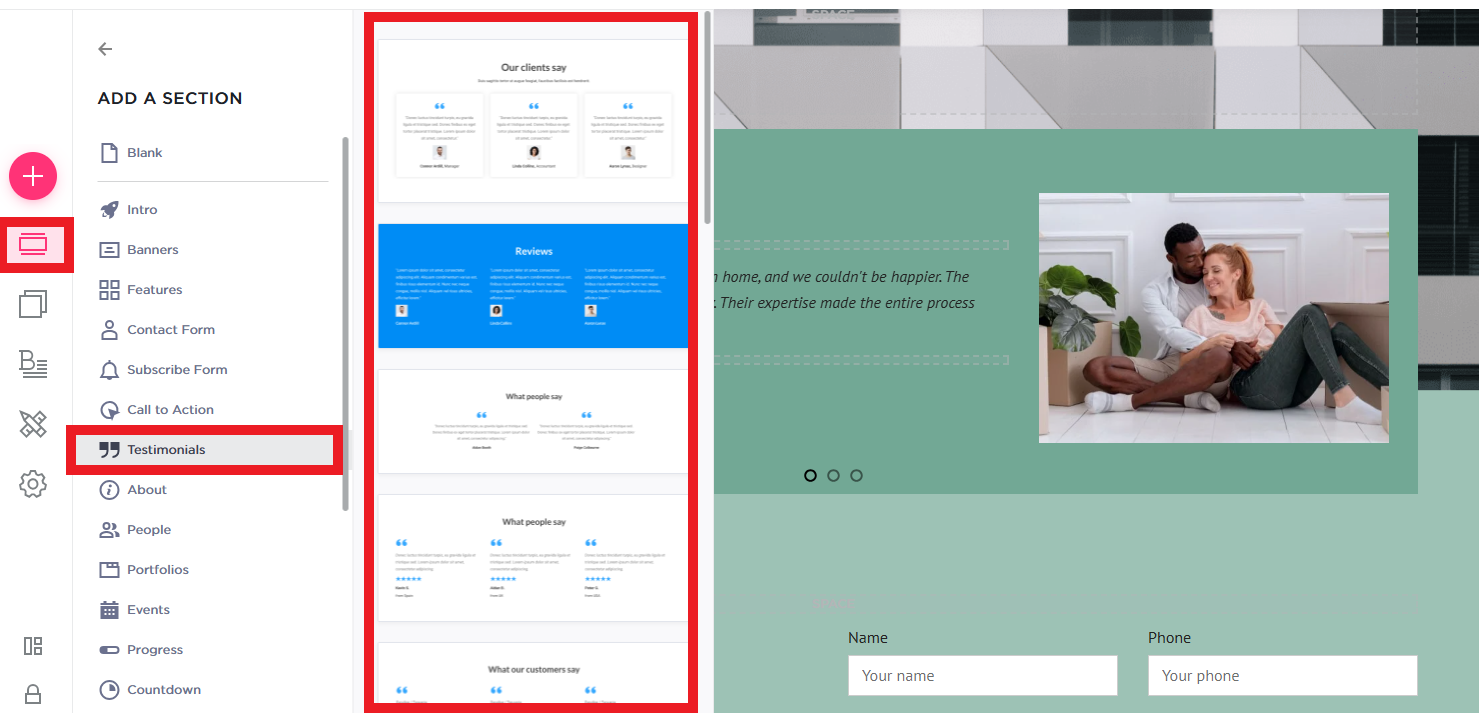
Step 2: Choose the Right Layout for Your Testimonial Wall
- Browse through the available templates in the website builder to find a layout that suits your brand’s style.
- Select a grid or carousel layout that can display multiple testimonials in an elegant, clean manner.
- Ensure the layout is mobile-responsive so your testimonials look great on all devices.
Step 3: Collect and Curate Testimonials
- Reach out to your satisfied customers and ask for feedback on your services.
- Request short, concise testimonials that focus on specific benefits they received from your products or services.
- Ask for permission to use customer names, photos, and their business logo (if applicable).
- Select the most impactful and relevant testimonials to include in your wall.
Step 4: Add Testimonials to Your Testimonial Wall
- Text Testimonials: Display text-based testimonials in an easy-to-read font. Use a font that is consistent with the rest of your website.
- Customer Photos: If possible, include customer photos alongside their testimonial to add authenticity.
- Company Logos: Display logos of businesses that have given testimonials, especially if they are well-known. This adds social proof to your website.
- Rating Stars: Use a star rating system to visually represent customer satisfaction. If applicable, allow users to see ratings alongside testimonials.
Step 5: Organize Testimonials by Category
- If your business provides different services or products, consider categorizing testimonials by service type.
- Create sections like “Web Design Testimonials,” “E-commerce Solutions Feedback,” or “Client Success Stories” for better organization.
- Add a filter or navigation bar that allows visitors to easily find the type of testimonials they are interested in.
Step 6: Design a Clean, Visually Appealing Testimonial Wall
- Spacing: Make sure there is enough spacing between testimonials to ensure readability and a clean design.
- Background: Use a simple, neutral background to make the testimonials stand out.
- Typography: Choose legible and professional typography. Highlight key quotes or sentences to catch the reader’s attention.
- Images and Icons: Use relevant icons like quotation marks, star ratings, or customer profile images to add visual interest.
Step 7: Add Interactivity for a Dynamic User Experience
- Carousel Slider: Use a carousel slider to rotate through multiple testimonials if you have a lot of feedback to showcase.
- Hover Effects: Implement hover effects on customer photos or text to make the testimonial wall more interactive.
- Pop-Up or Lightbox: For added engagement, use a lightbox effect to display more detailed testimonials when a user clicks on a specific testimonial.
Step 8: Optimize Your Testimonial Wall for SEO
- Add Alt Text for Images: Include descriptive alt text for any images, such as customer photos or logos, to help with search engine visibility.
- Use Keywords: Integrate relevant keywords into your testimonial descriptions that potential customers might search for.
- Meta Tags: Add relevant meta tags to the testimonial wall page for better search engine optimization (SEO).
- Internal Linking: Link to your testimonial page from other relevant sections of your website to improve SEO.
Step 9: Test the Wall for Mobile and Desktop Compatibility
- Preview the testimonial wall on both desktop and mobile devices to ensure it looks great on all screen sizes.
- Make sure the testimonials are easy to read, images are properly aligned, and buttons or sliders work smoothly on both platforms.
Step 10: Keep Your Testimonial Wall Updated
- Regularly add new testimonials as you receive feedback from customers.
- Remove outdated or irrelevant testimonials to ensure your wall stays fresh and relevant.
- Consider rotating the most recent or most impactful testimonials to keep the content dynamic.
By following these steps, you can create a modern, interactive, and aesthetically pleasing testimonial wall on your QuickServers website. A well-designed testimonial wall can significantly enhance your credibility, attract new customers, and showcase the value of your services.
