How to Create an Interactive Timeline for Your Business Story
A well-crafted interactive timeline is an engaging way to tell the story of your business. It allows visitors to easily explore the key milestones and achievements of your company over time. This guide will walk you through the steps to create an interactive timeline on your QuickServers website to effectively showcase your business journey.
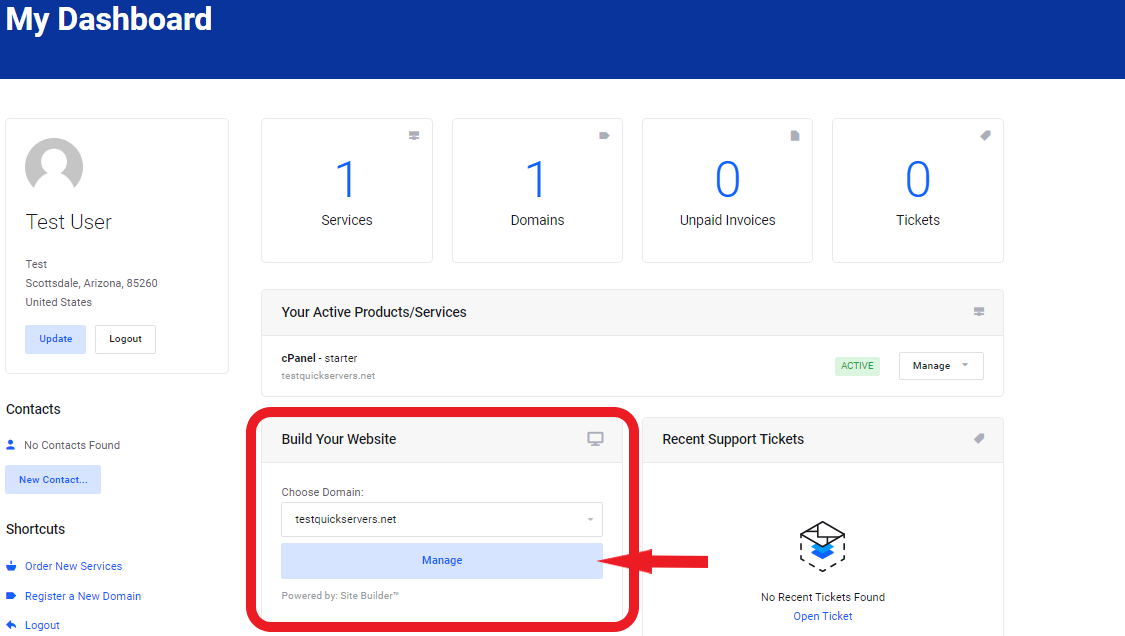
Step 1: Log into Your Website Builder
- Access your QuickServers account and go to the website builder section.
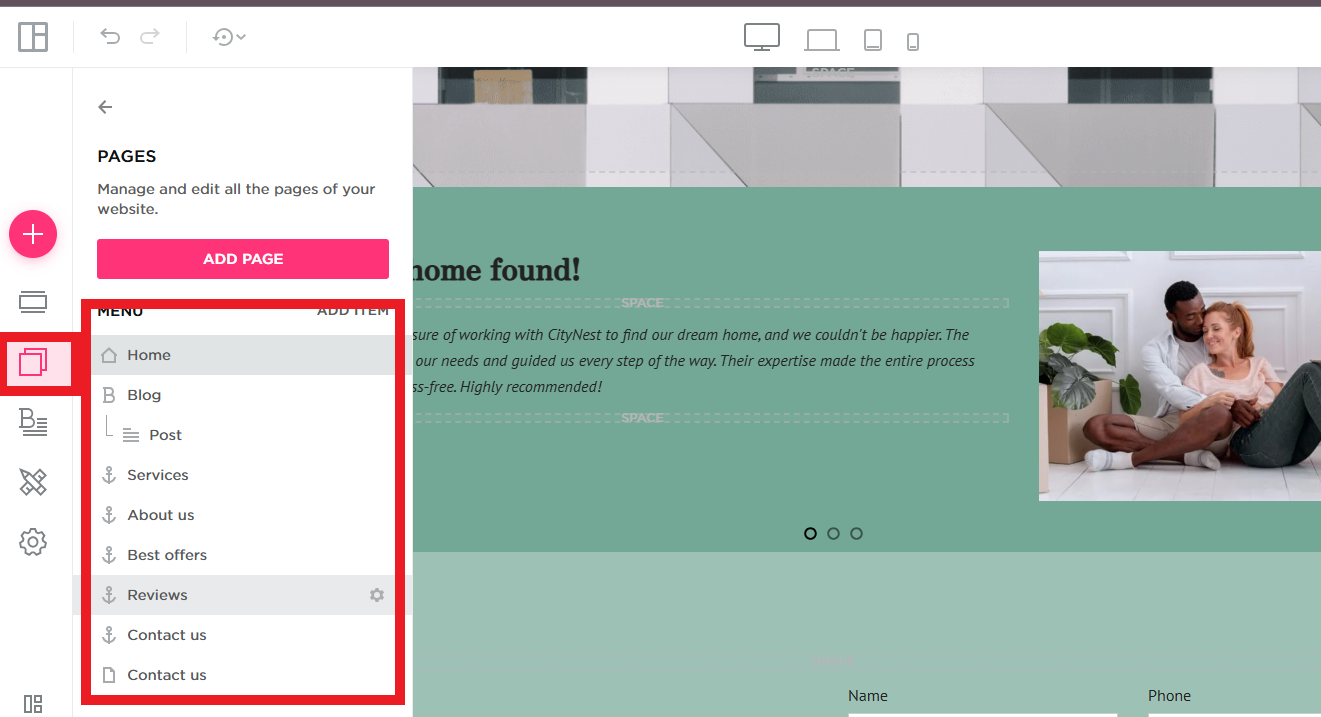
- Open the page where you want to add the interactive timeline or create a new page specifically for showcasing your business story.
Step 2: Choose a Timeline Element
- Click on the timeline from the elements.
- Drag & drop it on the page.

Step 3: Add a Title for the Timeline
- Add a text element at the top of the section to serve as the title of your timeline.
- Consider using a title such as “Our Business Journey,” “Our Timeline,” or “The Story of [Your Business Name].”
- Ensure that the title stands out by making it bold and easy to read.
Step 4: Set Up the Timeline Structure
- Use a vertical or horizontal layout that will allow you to present key milestones or events.
- You can create individual timeline “points” or “milestones” by adding text, images, or icons that correspond to specific years, months, or important moments in your business’s history.
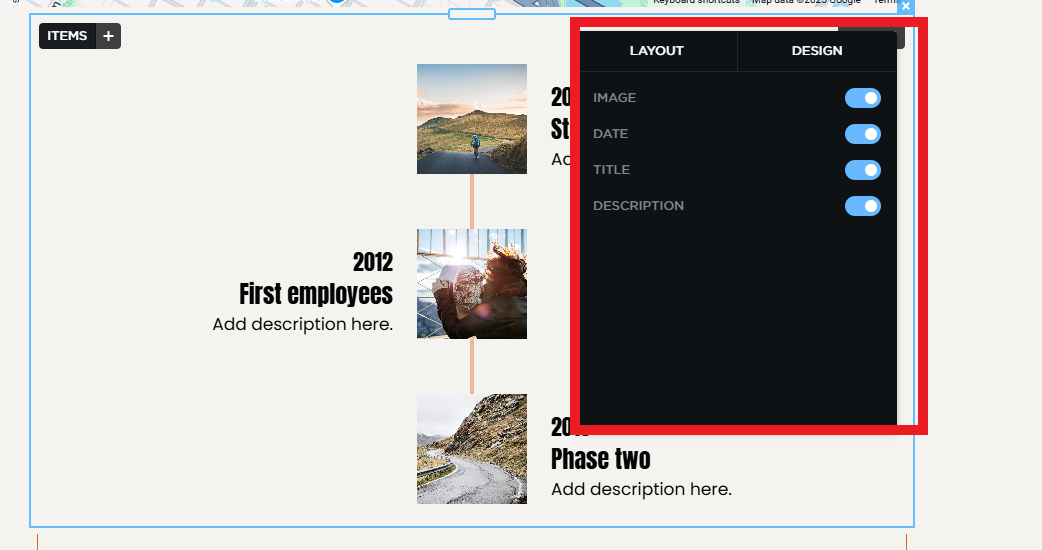
Step 5: Add Content for Each Milestone
- For each key milestone, add a corresponding date and brief description of what occurred.
- You may want to highlight important events such as product launches, partnerships, awards, or expansions.
- Use text elements to describe each milestone in short, digestible paragraphs or bullet points to ensure visitors can quickly understand the significance.
Step 6: Enhance with Images or Icons
- You can enhance each milestone by adding an image, logo, or icon that is relevant to the event.
- Consider using before-and-after images, photographs from the event, or logos of companies you’ve partnered with to bring the timeline to life.
- These visuals help to break up the text and make the timeline more visually appealing.
Step 7: Add Interactive Elements
- Use interactive design features to make your timeline more engaging.
- For example, you could add hover effects that display additional information when users hover over a milestone.
- You may also add clickable icons or images that lead to more detailed content, such as a blog post, news article, or page on your website with more in-depth information about that milestone.
Step 8: Style and Customize Your Timeline
- Customize the colors, fonts, and layout of your timeline to ensure it matches the overall design of your website.
- You may want to use a different background color or style for each milestone to make them stand out.
- Ensure that the timeline is easy to read by adjusting font sizes, line spacing, and alignment. Consider creating a subtle timeline line (like a line or dots connecting milestones) to visually guide the user from one point to the next.
Step 9: Optimize for Mobile Devices
- Switch to mobile view and ensure that the timeline looks great on smaller screens.
- Depending on the layout, you may need to stack milestones vertically for better mobile viewing.
- Test all interactive features, such as hover effects and clickable elements, to ensure they work seamlessly on mobile devices.
Step 10: Preview and Publish
- After completing your timeline, preview the page to check for consistency and ensure that everything looks visually appealing and functional.
- Once you’re satisfied, publish the page to make your interactive timeline live on your website.
By following these steps, you can create an engaging and interactive timeline to tell your business’s story. This feature not only adds visual interest to your website but also helps build a connection with your audience by showcasing the milestones that have shaped your company.
Whether you're highlighting your company's early days, major achievements, or future aspirations, an interactive timeline can help effectively communicate your journey and keep visitors engaged with your content.
