Linking Your Domain to a QuickServers Website or Hosting Plan
To get your site online, you need to connect your domain to your QuickServers website or hosting plan. QuickServers lets you control everything from your customer portal, whether you're setting up a new site, moving from another host, or pointing your domain to a specific server.
This guide will show you exactly how to connect your domain, change your DNS records, and check that the connection is working properly.
1. What You Need to Get Started
Make sure you have the following information before you connect your domain:
-
A domain that you own or manage through your QuickServers customer portal
-
An active QuickServers hosting plan or website service
-
The DNS or nameserver information that your hosting plan needs
-
The ability to access your QuickServers customer dashboard
If you have these ready, the connection process will go quickly and smoothly.
2. Go to the QuickServers Customer Portal and log in.
To start:
-
Go to the QuickServers website.
-
Use your customer portal login information to sign in.


-
After you sign in, you'll see areas for domains, hosting, billing, and support.
In the Domains section, you'll find everything you need to connect your domain.
3. Click on "My Domains"
From the dashboard:
-
Click on "Domains"


This shows all the domains that are connected to your QuickServers account.
Pick the domain you want to link to your hosting plan or website.
4. Go to your domain management page
After you choose your domain:
-
Click on the domain name to see the management screen.
-
Find choices like "Nameservers," and "DNS Management."
This is where you will direct your domain to your hosting service.
5. Decide how you want to link your domain
There are two main ways to connect your domain, depending on how you have it set up:
-
Changing Nameservers
If your hosting plan includes nameservers, use this.
For example,ns1.quickservers.netandns2.quickservers.net. -
Changing DNS Records
If your hosting needs A, CNAME, or other records, use this.
Your QuickServers hosting plan will tell you which method to use.
6. Option 1: Update Nameservers
If your QuickServers hosting plan includes nameservers:
-
Click on the Nameservers tab in your domain settings.
-
Choose the option to use nameservers that you make yourself.
-
Type in the nameserver pair (or more than one nameserver) that came with your hosting plan.
-
Keep the changes.
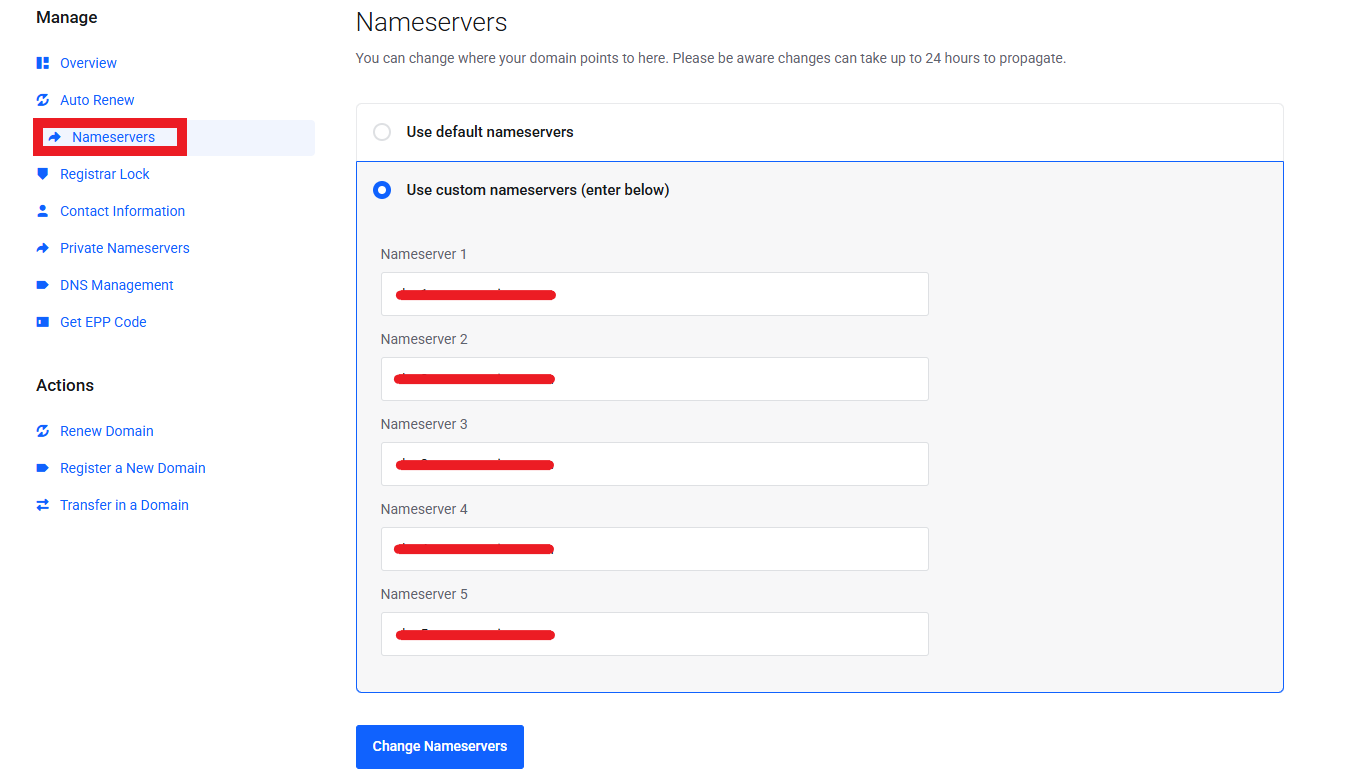
Nameserver updates let the internet know that QuickServers handles all DNS tasks.
Depending on where you are, DNS propagation usually takes 1–24 hours.
7. Option 2: Change the DNS records (A, CNAME, or MX records)
If your hosting plan or website needs DNS entries instead:
-
Click on "DNS Management" or "Zone Editor."
-
Check that DNS Management is turned on
-
Add or change the records that are needed
Here are some common DNS settings:
-
A Record – Tells your domain where to find an IP address
Example:
Host:@
Value:123.123.12.1 -
CNAME Record – This record tells a subdomain to point to another domain.
Example:
Host:www
Value:yourdomain.com
Save each record and give it time to spread.
8. If you need to, point the "www" version of your domain to the right place.
You may need to manually point "www" to your main domain in some hosting setups:
-
Create a CNAME Record
Host:www
Value: your main domain, likeyourdomain.com

This makes sure that both versions of your domain load your site.
9. Give DNS time to spread
After you change the nameservers or DNS:
-
Small DNS changes take 5–30 minutes
-
Larger updates (nameservers, MX) take 1–4 hours
-
Full global propagation can take up to 24 hours
Your domain may load differently at this time, which is normal.
10. Check Your Domain Connection
Check after propagation has begun:
-
When you go to your domain, does your website load?
-
Does the version with "www" load properly?
-
Is the domain pointing to the right hosting plan?
-
Are any old DNS records getting in the way of the connection?
You can also check DNS updates with tools you find online.
11. Use One Portal to Manage Your Domain and Hosting
You can do the following with the QuickServers customer portal:
-
Change nameservers
-
Manage or add domain forwarding
-
Renew your domain
-
Manage your hosting plan and services
-
Update DNS records at any time
Managing your website and domain is easy when you keep everything in one place.
The Bottom Line
Once you know whether to use nameservers or DNS records, it's easy to link your domain to a QuickServers website or hosting plan. QuickServers gives you everything you need to confidently manage your domain and keep your website running smoothly. You have full control over DNS and a customer portal that is easy to use.
QuickServers makes it quick, easy, and reliable to set up a new site or move an old one.
