How to Set Up Subdomains on Your QuickServers Domain
Setting up subdomains is a great way to organize different sections of your website, host separate projects, or create dedicated environments for blogs, stores, support portals, and more. With QuickServers, you can create and manage subdomains directly from your customer portal by updating your DNS settings.
This step-by-step guide shows you how to create subdomains, point them to the right server or service, and confirm they’re working properly.
1. What a Subdomain Is and Why You Might Use One
A subdomain is a prefix added before your main domain name.
Examples include:
-
blog.yourdomain.com -
shop.yourdomain.com -
support.yourdomain.com
Subdomains help you:
-
Separate different sections of your site
-
Host new services or projects
-
Run testing or development environments
-
Organize content without buying new domains
They work like normal domains but depend on your main domain’s DNS settings.
2. Log in to the QuickServers Customer Portal
To begin:
-
Visit the QuickServers website.
-
Log in using your customer portal credentials.
- After logging in, you’ll see sections for domains, services, billing, and support.


Everything you need to create subdomains is located in the Domains area of your portal.
3. Open “My Domains” and Select Your Domain
From your dashboard:
-
Click Domains

You’ll now see all domains currently linked to your QuickServers account.
Click the domain name for which you want to create a subdomain.
4. Go to the DNS Management Page
After selecting your domain:
-
Click the domain name to open the management screen
-
Look for DNS Management.
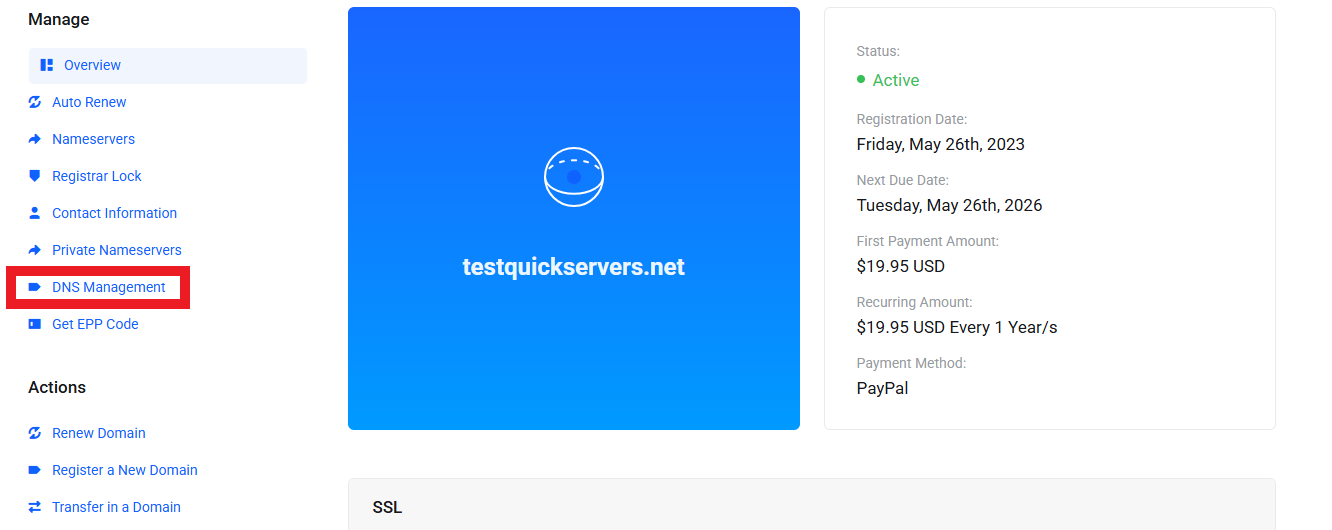
This is where you’ll add DNS records for your new subdomain.
You may need to enable DNS Management if it is not already active.
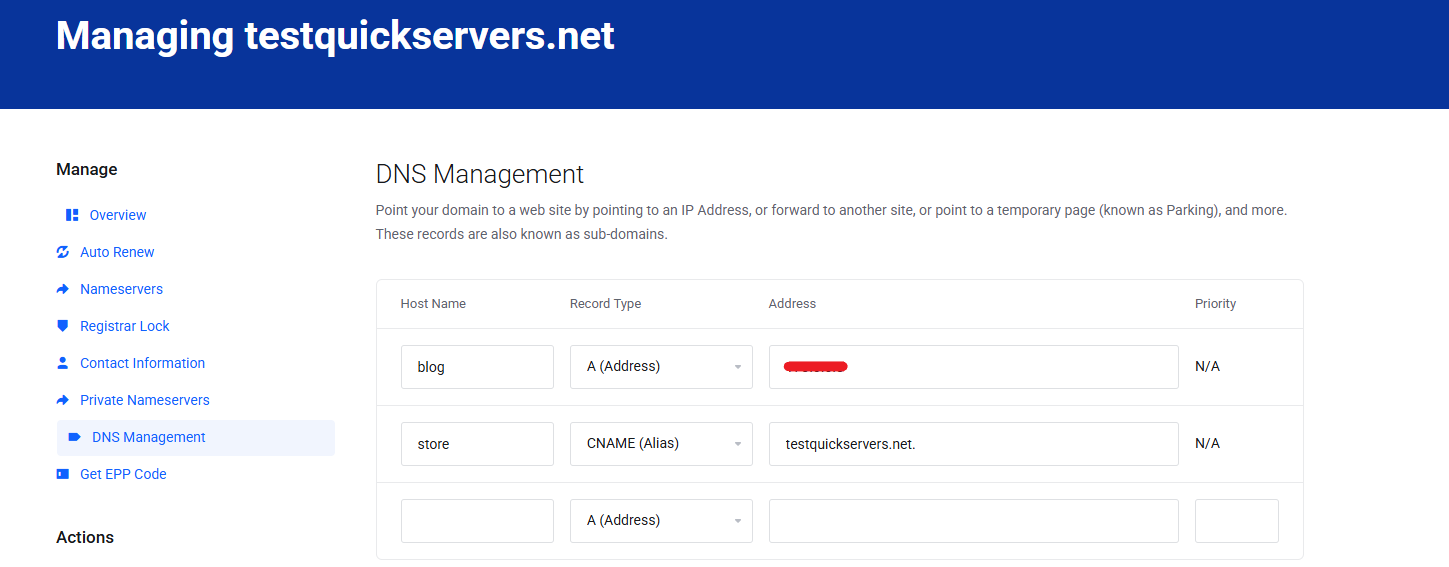
5. Add a DNS Record for Your Subdomain
To create a subdomain, you’ll add a DNS record.
Most subdomains use either an A record or a CNAME record, depending on where you want them to point.
To add a new record:
-
Click Add Record
-
Choose the type of record (A or CNAME)
-
Enter the required values
-
Save your changes
Examples:
Creating an A Record:
Host: blog
Value: The IP address of your hosting server
TTL: Default
Creating a CNAME Record:
Host: store
Value: yourdomain.com
TTL: Default
Your hosting plan or service will tell you which type to use.
6. If Needed, Create Multiple Subdomains
Repeat the same steps to create additional subdomains, such as:
-
help.yourdomain.com -
login.yourdomain.com -
dev.yourdomain.com
Each subdomain can point to a different application, directory, or server.
7. Configure Your Hosting to Serve the Subdomain
After creating DNS entries, make sure your hosting system knows how to handle the new subdomain.
This may include:
-
Adding the subdomain inside your hosting control panel
-
Uploading files to the correct subdomain directory
-
Linking the subdomain to an application or website builder


8. Give DNS Time to Propagate
DNS changes don’t update everywhere instantly.
Typical propagation times:
-
Minor changes: 5–30 minutes
-
Most subdomain updates: 1–2 hours
-
Full global propagation: up to 24 hours
During this time, some visitors may see the new subdomain while others see nothing yet.
9. Test Your Subdomain
Once propagation begins, check:
-
Does the subdomain load in your browser?
-
Does it point to the correct server or page?
-
Are there any DNS errors or loading issues?
You can also use online DNS check tools to verify that your subdomain is resolving properly.
10. Edit or Remove Subdomains Anytime
If you need to change or delete a subdomain:
-
Return to DNS Management
-
Find the record for the subdomain
-
Click Edit to change it, or Delete to remove it
-
Save changes and wait for propagation
This lets you reorganize or update your site structure at any time.
The Bottom Line
Creating subdomains on QuickServers is simple and gives you more flexibility when organizing your website, launching new projects, or separating different areas of your online presence. You can manage all subdomains through the DNS tools in your customer portal, making it easy to build and expand your site however you need.
QuickServers gives you full control to manage subdomains, DNS settings, and hosting connections—all from one powerful, easy-to-use dashboard.
